How to Cancel Your Mojikoshi-san Paid Plan - Step-by-Step Guide
Zoom Transcription: Easy Minutes & Top Efficiency Tips
Sept. 27, 2025
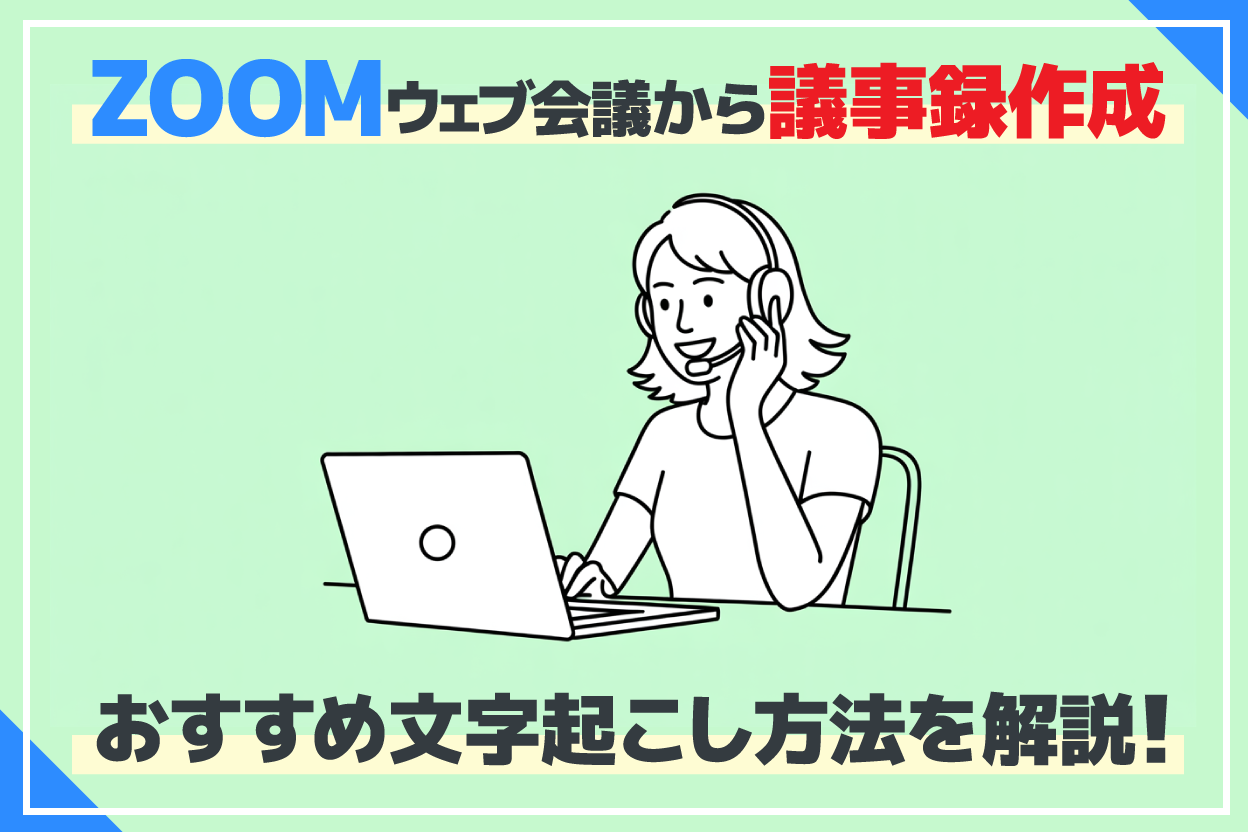

Transcribing meeting minutes after a Zoom call can be tough...
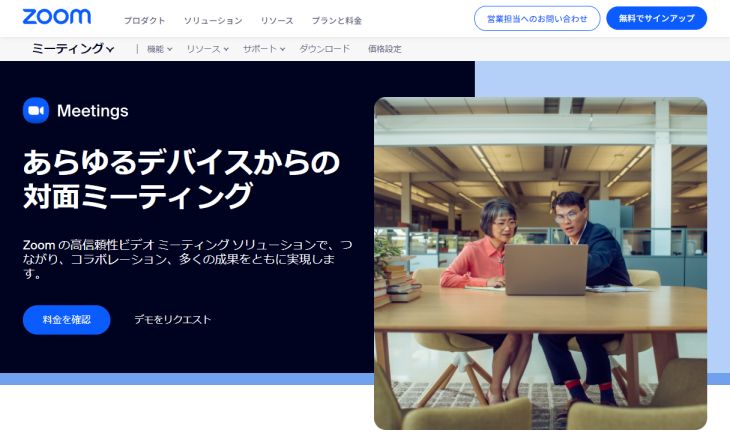
When it comes to online meeting tools, Zoom is often the go-to.
Are you spending too much time and effort creating meeting minutes from your Zoom web conferences?
Actually, creating meeting minutes from Zoom call content can be incredibly easy by using a convenient transcription tool!
Zoom itself includes a transcription feature as a tool to assist with web conferences.
However, Zoom's standard transcription tool is primarily for assistance, so if you want to create meeting minutes more efficiently, it's recommended to use an AI tool specialized in transcription.
This article introduces recommended transcription methods that will make creating meeting minutes after a Zoom call much easier!
We'll cover both Zoom's standard transcription feature and methods using external tools, so if you're struggling with meeting minute creation, please use this as a reference.
Can Zoom Meeting Minutes Be Easily Transcribed?
Creating meeting minutes is crucial when holding a conference.
Naturally, you also need to create meeting minutes for web conferences held on Zoom.
How can you easily transcribe Zoom web conferences?
Zoom has a feature for creating meeting minutes

In conclusion, it is possible to transcribe and create meeting minutes using only Zoom's standard features.
Zoom has subtitle generation and download functions, which you can use to create meeting minutes.
However, since its primary function is subtitle display, you will need to edit the content afterward to summarize statements by speaker or format it for readability.
To create meeting minutes more efficiently, it's recommended to use a dedicated external transcription tool.
Zoom and transcription tool integration is recommended

To efficiently transcribe meeting minutes from Zoom web conferences, it's recommended to transcribe the meeting content with a specialized AI tool.
The Zoom app includes a recording feature.
When recording is turned ON, it automatically saves after the meeting ends. Then, you can simply upload it to a transcription tool like Mr. Transcription to easily transcribe it.
Automatic transcription by speaker is also possible!
Mr. Transcription: Recommended service for Zoom transcription
Mr. Transcription is an AI transcription service highly recommended for transcribing meeting minutes from Zoom web conferences.
Mr. Transcription is a Japanese-developed transcription service that uses the latest AI.
It's easy to use: simply upload your Zoom meeting content file from this top page!
You can upload the "mp4" file format saved when recording Zoom directly, so no file conversion is necessary.
Furthermore, you can easily create meeting minutes from audio using the meeting minute creation feature!
The processing is completed in just a few seconds, and the meeting minute file can be downloaded in Word format, so you can finalize your meeting minutes immediately after the meeting ends.
Mr. Transcription is available for free!
You can transcribe files up to 3 minutes for free, without registration or login, allowing you to start creating meeting minutes easily right away.
If you're unsure about Zoom transcription, why not try Mr. Transcription first?
Transcribe Microsoft Teams and Google Meet with the latest AI for a smooth experience
This article also explains how to transcribe Microsoft Teams and Google Meet, widely used web conferencing software alongside Zoom.
Please take a look.

How to Create Meeting Minutes with Zoom & Mr. Transcription
If you want to transcribe Zoom web conferences conveniently and accurately, using a dedicated AI transcription tool is highly recommended!
With Mr. Transcription, you can not only transcribe but also create meeting minutes using the latest AI!
Here's how to transcribe and create meeting minutes with the AI transcription tool, Mr. Transcription.
1. Save meeting content in Zoom
First, save the content of your web conference using Zoom's recording feature.
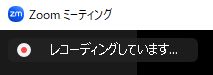
The method is very simple: just click "Record" in the menu at the bottom of the Zoom meeting screen.

This will start recording the web conference.
During recording, "Recording..." will be displayed in the upper left corner of the screen.
When the web conference ends, it will automatically be saved in mp4 format.
While saving, "Converting meeting recording" will be displayed like this.
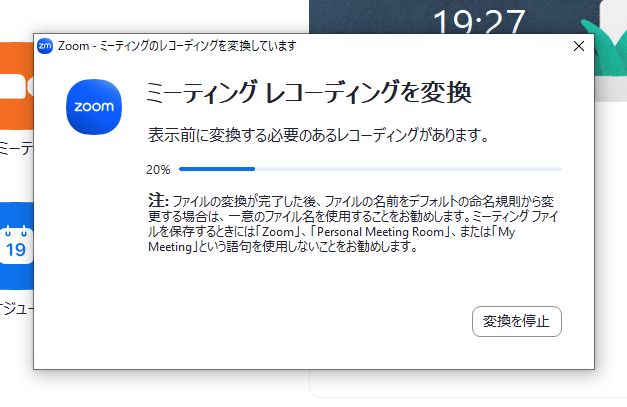
Saving is complete when this display disappears.
Note that only the meeting host can save
When recording Zoom web conference content, it's important to note that only the meeting host can use this feature.
Be aware that you will need to ask the meeting host to save, or have them transfer host privileges to the person who wants to save.
2. Upload the mp4 file to Mr. Transcription
After the web conference, upload the mp4 file to the AI transcription tool, Mr. Transcription, for transcription.
Open the top page of Mr. Transcription from this link.
Uploading is very easy!
Simply drag and drop the mp4 file into the "Drag files here" section on the top page, or select the file using the "Select" button.
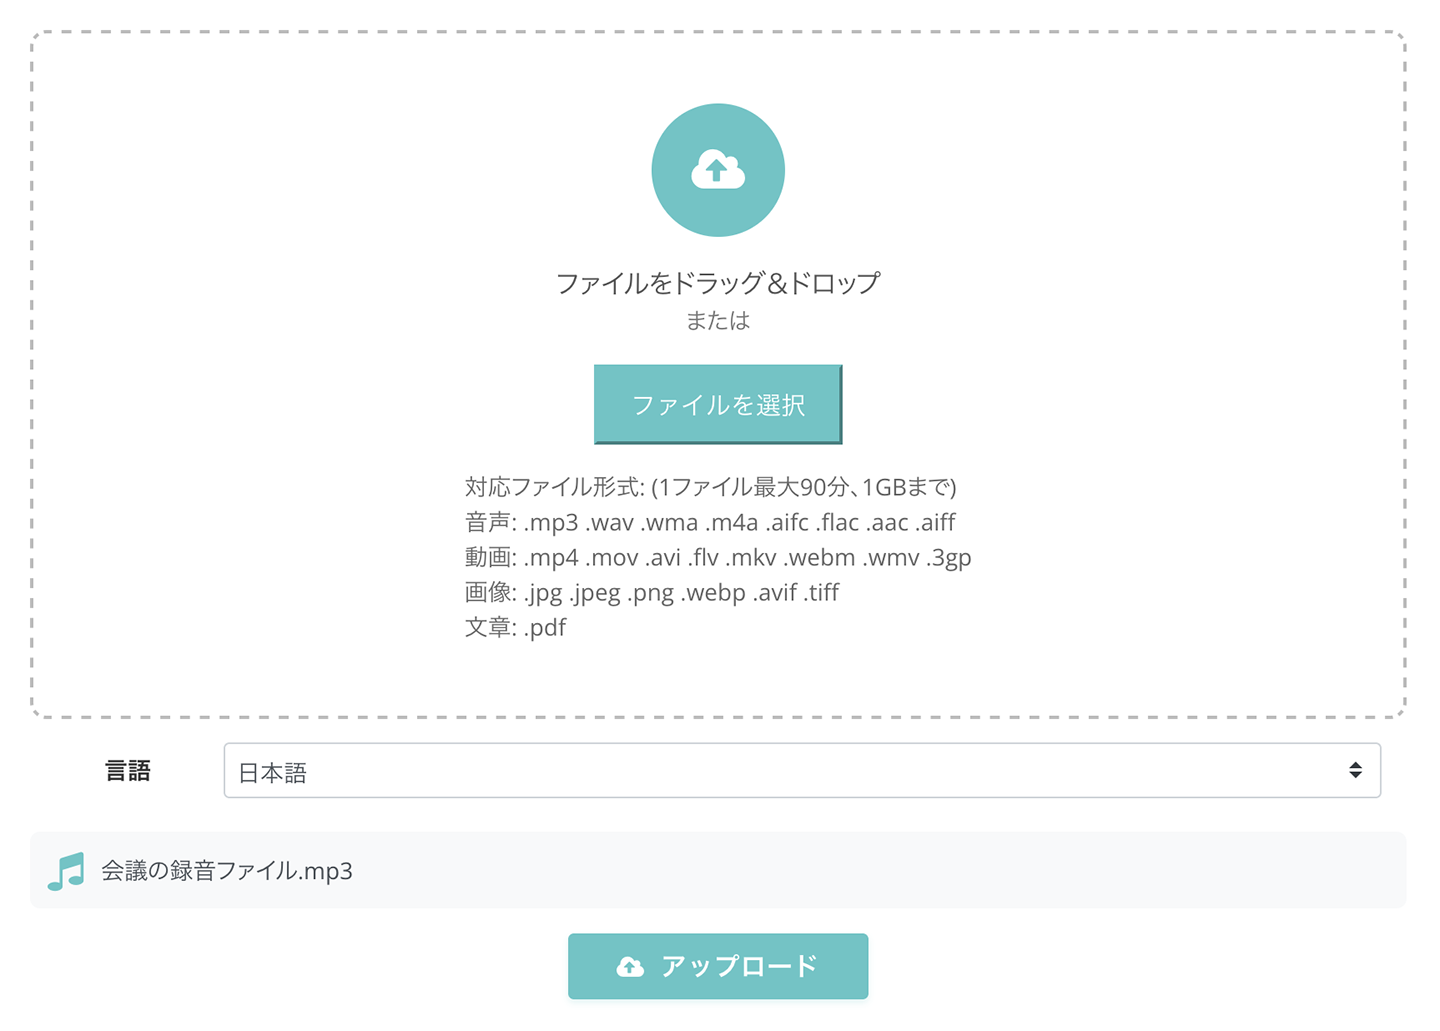
Mr. Transcription supports mp4 file uploads, so you can upload recorded files directly without conversion.
Mr. Transcription's speech recognition AI is highly advanced.
Even long files can be processed in just 10 minutes (shorter files complete in seconds!), so you can check transcription results immediately after your meeting.
3. Start transcription
Once the upload is complete, transcription processing will start automatically.

Once processing begins, you can close the browser window.
You will receive a notification email when processing is complete.
*If you use it for free without registration/login, you need to keep the browser open.
4. Transcription complete
Once transcription is finished, you can check the results on the "History" page.
You can open the "History" page from the menu on the official Mr. Transcription website.
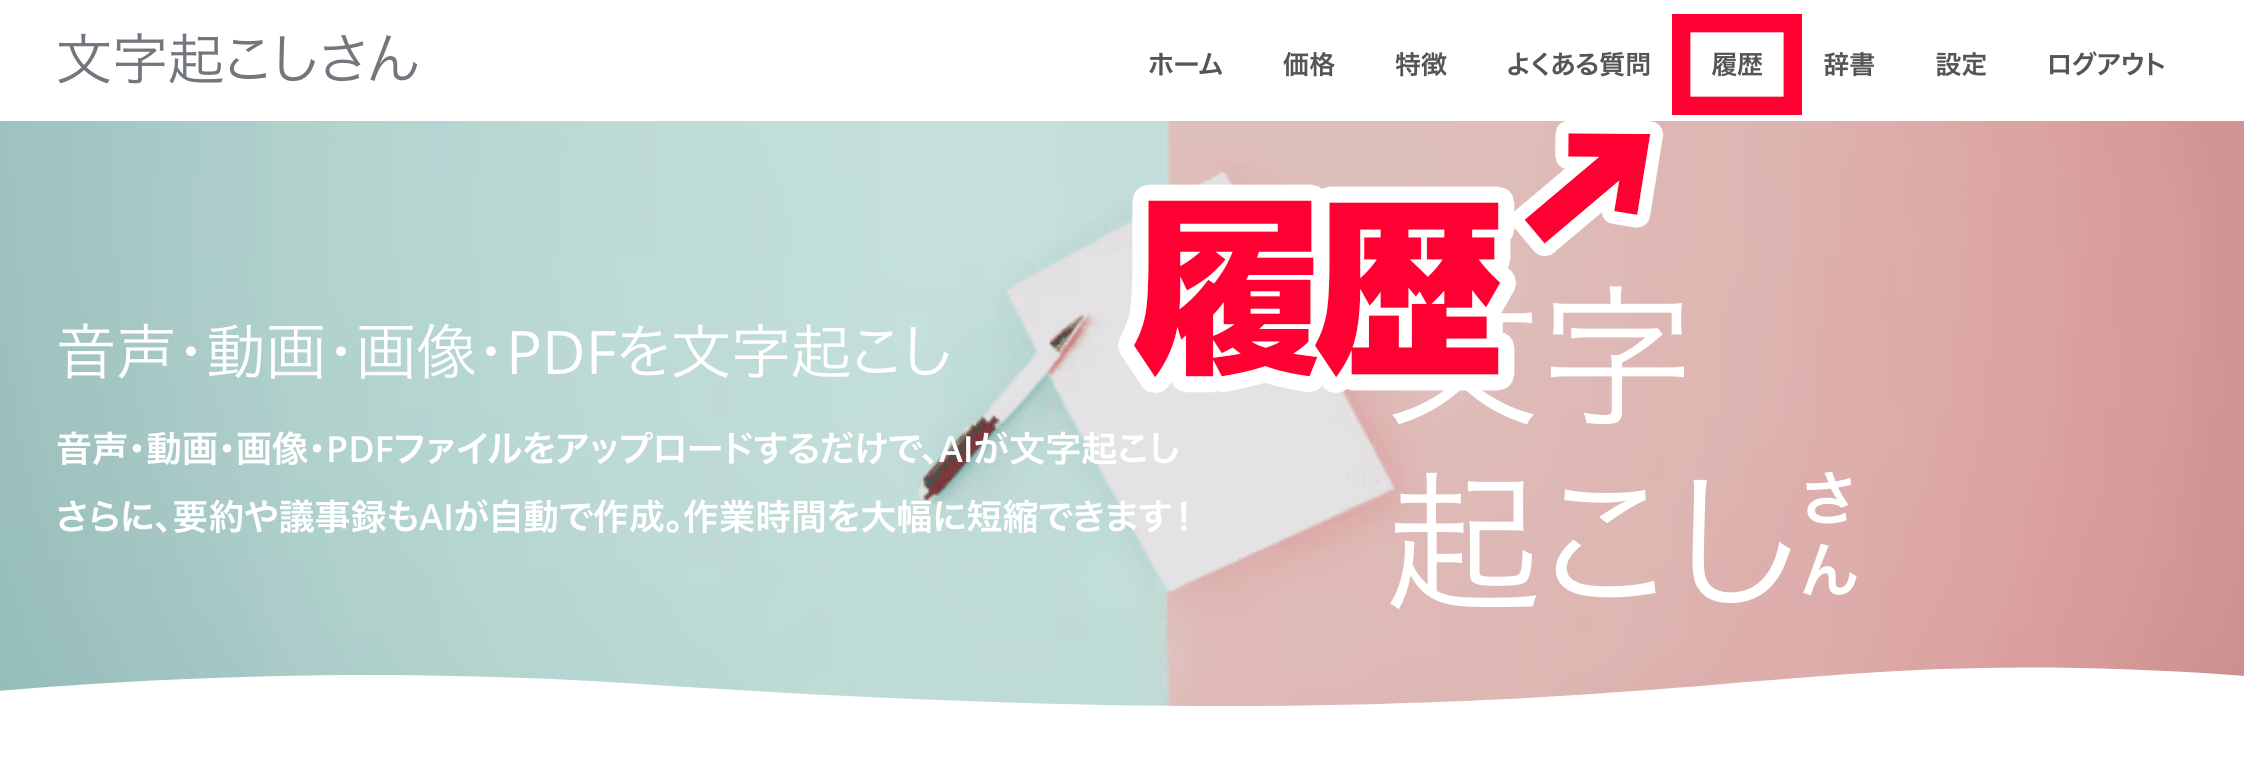
If you kept the top page open, the display on the top page will change, and the transcription results will be shown.

5. Create meeting minutes with Mr. Transcription
Once transcription is complete, create the meeting minutes!
Below the transcription results, you'll find "Summarize" and "Create Meeting Minutes" buttons.

To create meeting minutes, click the "Create Meeting Minutes" button.
Clicking the button starts generating meeting minutes with the latest AI.
In just a few seconds, your meeting minutes will be complete, like this!
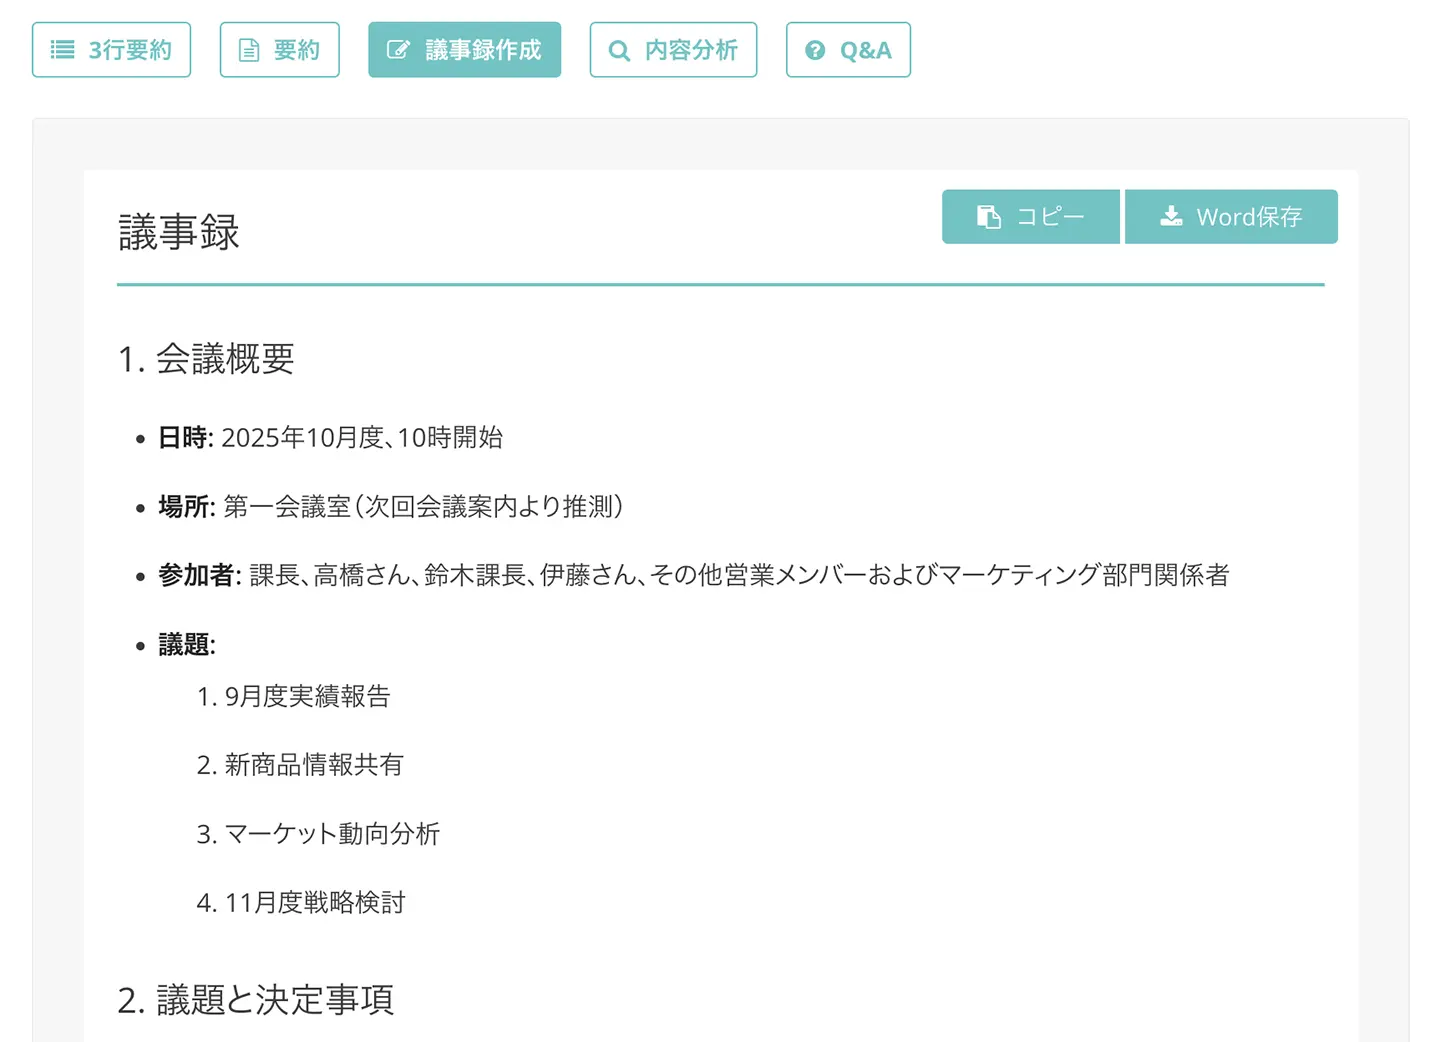
The created meeting minutes can be downloaded in Word format.
This completes the process of transcribing Zoom web conferences and creating meeting minutes using Mr. Transcription!</
■ AI transcription service "Mr. Transscription"
"Mr. Transcription" is an online transcription tool that can be used from zero initial cost and 1,000 yen per month (* free version available).
- Supports more than 20 file formats such as audio, video, and images
- Can be used from both PC and smartphone
- Supports technical terms such as medical care, IT, and long-term care
- Supports creation of subtitle files and speaker separation
- Supports transcription in approximately 100 languages including English, Chinese, Japanese, Korean, German, French, Italian, etc.
To use it, just upload the audio file from the site. Transcription text is available in seconds to tens of minutes.
You can use it for free if you transcribe it for up to 10 minutes, so please try it once.
It is "Mr. Transcription" who can easily transcribe from audio, video, and images.
Transcription allows you to transcribe for up to 10 minutes for free.
You can copy, download, search, delete, etc. the transcribed text.
You can also create subtitle files, which is ideal for transcription of interview videos.
HP: mojiokoshi3.com
Email: mojiokoshi3.com@gmail.com
Email: mojiokoshi3.com@gmail.com
Related article
Transcription for audio / video / image transcription. It is a transcription service that anyone can use for free without installation.
- What is Mr. Transcription?
- Transcript images, sounds, and videos with Mr. Transcription
- Free registration
- Rate plan
- manual
- Try other free services