Mojikoshi-san Payment Methods & Receipt Information
Windows 11 Speech-to-Text: 10 Best Apps for 2026
Oct. 9, 2026

If computers have come this far, why can't we just create meeting minutes with automatic transcription...?
Are you struggling with transcribing meeting minutes or interviews?
Voice input on smartphones and recording meetings or web conferences are becoming more and more common.
But creating minutes by hand from audio or video data takes a lot of time and effort, doesn't it?
So in this article, we have put together ways to transcribe efficiently on the Windows PC you already use, plus recommended tools and popular apps!
There are three ways to transcribe on Windows.
- Convert the voice you are speaking right now into text on the spot
- Convert recorded audio and video files into text
- Process audio only on your computer, without sending it over the internet
By choosing the method that fits your purpose, you can stop spending time on repetitive tasks and focus on the work that matters.
We explain the recommended methods, so please read to the end.
Three Ways to Transcribe on Windows
First, here are the features of the three ways to transcribe on Windows and the situations each one suits.
If you want to convert the voice you are speaking right now into text on the spot, you can use the voice typing feature built into Windows.
Just speak into your PC's microphone, and what you say is entered as-is in Notepad or Word.
*An internet connection is required.
If you want to transcribe recorded audio or video files, we recommend the recording transcription feature of Microsoft 365 (Word) or an AI transcription service where you upload files from your browser.
Both are online services that convert your files to text automatically once you upload them.
If you want to process audio only on your computer, without sending it over the internet, you can also install a transcription app that runs locally.
This method is recommended when company rules prevent you from using online web apps.
However, the transcription accuracy may be lower, and the processing speed may vary depending on your computer's performance.
The following list of 10 recommended apps and software covers all of these methods, so please take a look!
10 Recommended Automatic Transcription Apps and Software for Windows 11
Typing out transcriptions character by character in a text editor such as Notepad or in Word takes a great deal of effort.
In fact, by using transcription apps and software that work on Windows, you can transcribe in much less time and with high accuracy!
Let's start right away with the recommended apps and popular software!
- Mr. Transcription
- UserLocal
- Google Docs
- Okoshiyasu2
- Express Scribe
- Voice Rep Pro 4
- Voice Code
- Shunkan Text
- Rec Text AI
- Scribe Assist
1. Mr. Transcription | A Popular, Recommended Web App with All-Around Features
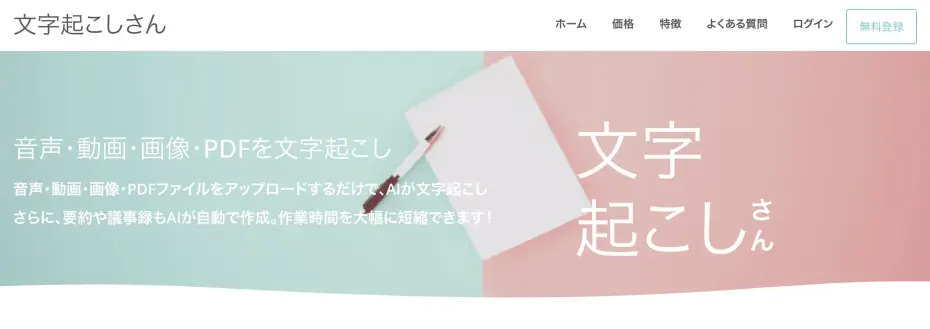
“Mr. Transcription” is a recommended all-around AI transcription service.
It is a web app that runs in your browser, and of course it supports Windows 11.
Versatility that handles all kinds of transcription methods is its key strength.
On top of that, Mr. Transcription is free to use!
It supports not only audio and video but also transcription (OCR) from images and PDF files.
You can try image transcription for free with the image transcription tool, and PDF transcription with the PDF transcription tool.
The image OCR feature also supports vertical text.
It supports a wide range of formats, including audio files such as MP3, WAV, WMA and M4A and video files such as MP4 and MOV, so you can transcribe automatically and easily just by uploading your file as it is.

Supported Files and File Sizes of Mr. Transcription: How to Convert Unsupported Files into Supported Files
This article explains which files Mr. Transcription supports and what to do with files that are not supported.
Quickly Transcribe with the Latest AI Speech Recognition Engine!
“Mr. Transcription” uses the latest AI speech recognition engine!
Even long audio files can be converted to text in just about one minute.
It also comes with many useful features, such as support for Japanese, English, Korean, Chinese and 100 languages in total, and speaker separation that transcribes audio from meetings and similar settings for each speaker.
You can also create SRT files for video subtitles.
Summary, Analysis and Meeting Minutes Features Included!
Mr. Transcription also includes summary, analysis and meeting minutes features!
Once the transcription result of your audio, video, image or PDF file appears, just press a button and the latest AI automatically reviews the content.
A summary, analysis results and a minutes file are ready right away!
You can make use of audio and video in one stop without using other AI services!
The summary, analysis and meeting minutes features are explained in detail in this article.

[Free] AI Summary and Meeting Minutes Features Now Available in Mr. Transcription! A Detailed Guide
The AI summary feature and the meeting minutes feature have been added to Mr. Transcription! With this feature, you can easily summarize long texts transcribed from audio. Meeting minutes can also be created easily just by pressing a button! Your daily work, study and information organization become smoother...
[Free] A Web App Anyone Can Use with Simple Operation
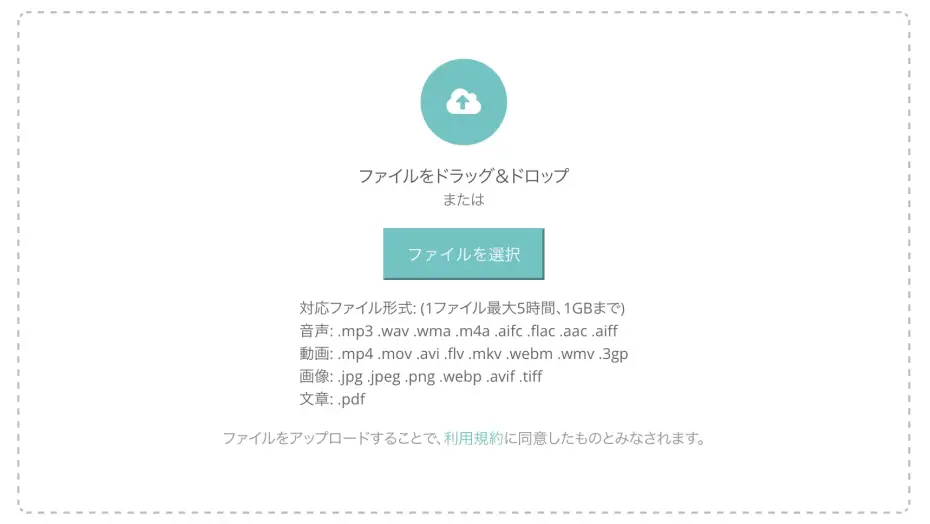
With “Mr. Transcription,” just open the top page and upload your file. It is simple to use.
The AI takes care of everything else.

A User Guide to Mr. Transcription [From Registration to Completed Transcription]
This article explains how to use Mr. Transcription step by step, from registration and uploading to checking results, with images. It also covers pricing plans and useful features such as AI summaries and subtitle output.
Because it is a fully automatic AI transcription service, anyone can easily, without hesitation, convert audio and video into text.
If you are looking for an automatic transcription service or app for a Windows 11 PC, “Mr. Transcription” is the one to try first!
You can try it free for up to 3 minutes without registering, and with a free account you can transcribe up to 10 minutes per day, so why not experience the performance of AI transcription first?
2. UserLocal Voice Minutes System | A Simple Transcription Web App

UserLocal Voice Minutes System is an automatic transcription web app that you use from your browser.
As its name suggests, it is ideal for meeting minutes: just share a URL and it compiles everything by speaker with timestamps.
Participants' remarks are transcribed automatically, and you can also correct the content of your own remarks.
It also has unique features, such as analyzing the sentiment of each user's remarks as “positive/negative” or as one of five emotions (joy, liking, sadness, fear, anger), and extracting specific words.
It is a service recommended for people looking for a transcription service for meeting minutes.
3. Google Docs | Simple Transcription with a Popular Web App

In fact, you can also transcribe simply with Google Docs.
For people who already use it every day, the advantage is that you can easily transcribe with voice typing.
As a basic feature, there is voice typing, which transcribes what you say into the microphone.
As shown here, transcription starts when you click the microphone.
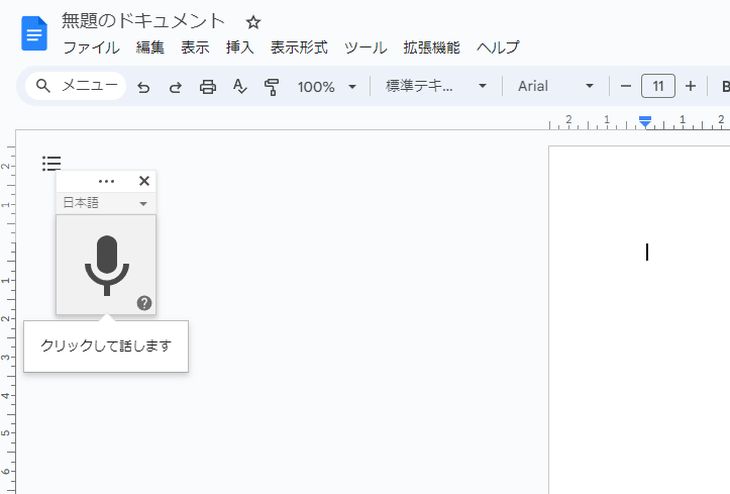
You can also transcribe audio files automatically by using it in a creative way.
To convert an audio file into text, you need to set up a feature called “Stereo Mix” so that Google Docs can recognize the audio playing in your player software.
Setting: Sound → Recording → Right-click “Stereo Mix” → Set as Default Device: ON
With this setting, Google Docs open in your browser can recognize the audio from your player software.
After that, simply play an audio file such as MP3, WAV or WMA in this state, and the audio file is transcribed automatically.
Dedicated AI transcription services such as “Mr. Transcription” are more convenient to use, but for people who already use Google Docs every day, this is an easy method.

[Free] 4 Easy Ways to Transcribe with Google Docs
For those who want to make the most of the voice typing feature in Google Docs, this article explains in detail how to transcribe in real time, convert audio data to text, create minutes of web meetings, and extract text from images and PDFs.
4. Okoshiyasu2 | A Popular Support App for Transcribing While Listening to Audio
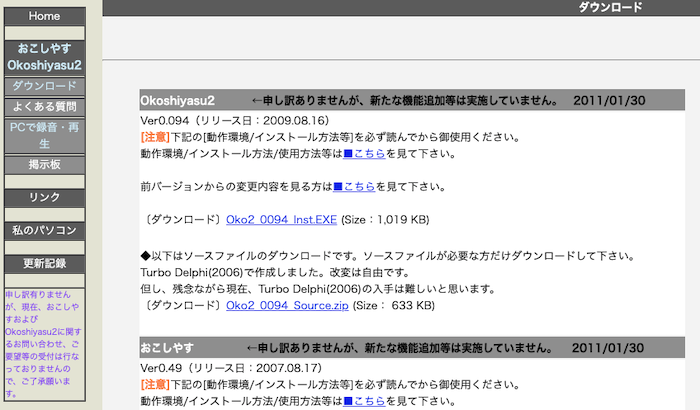
Okoshiyasu2 is a dedicated transcription player app (audio playback software) for Windows.
It has long been the standard Windows app for transcribing with the keyboard while listening to audio, and lets you play, pause, rewind and fast-forward without taking your hands off the keyboard.
It is transcription playback software that was last updated in 2009, so the supported audio files are limited to WAV, MP3, WMA and ogg.
A weakness is that audio recorded on a smartphone may need to be converted beforehand, depending on the model.
However, the operation is very simple, and its strength is that you can start using it right away without wondering how.
5. Express Scribe | A Transcription Player App for Windows
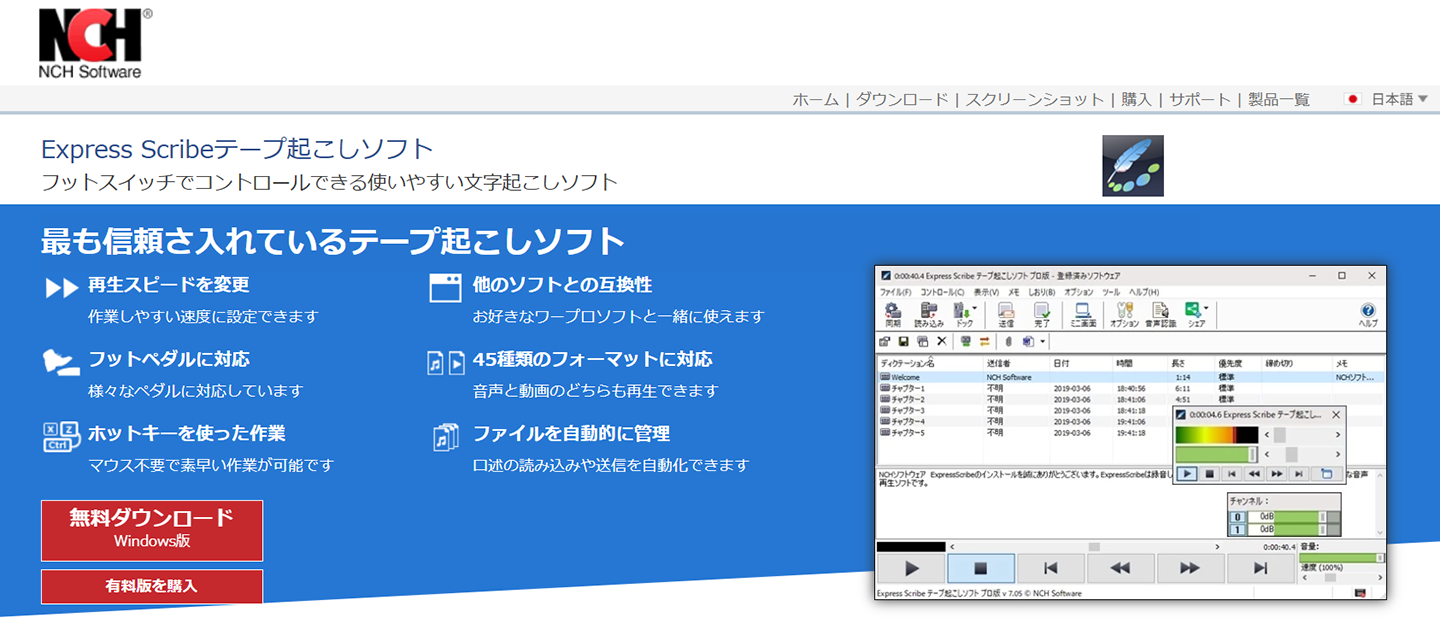
Express Scribe is also a dedicated transcription player app (audio playback software) that you can use on a Windows PC.
There are a free plan and a paid plan.
Like Okoshiyasu2 introduced above, it lets you play, pause, rewind and fast-forward smoothly, and a key point is that, with professional use in mind, it also supports operation with a foot pedal (a pedal you operate with your foot).
With a foot pedal, both hands are free, so you can transcribe on the keyboard more smoothly.
It takes some skill to master, but it is playback software that becomes a reliable partner when you transcribe by hand with a keyboard.
6. Voice Rep Pro 4 | A Transcription App You Install on Windows
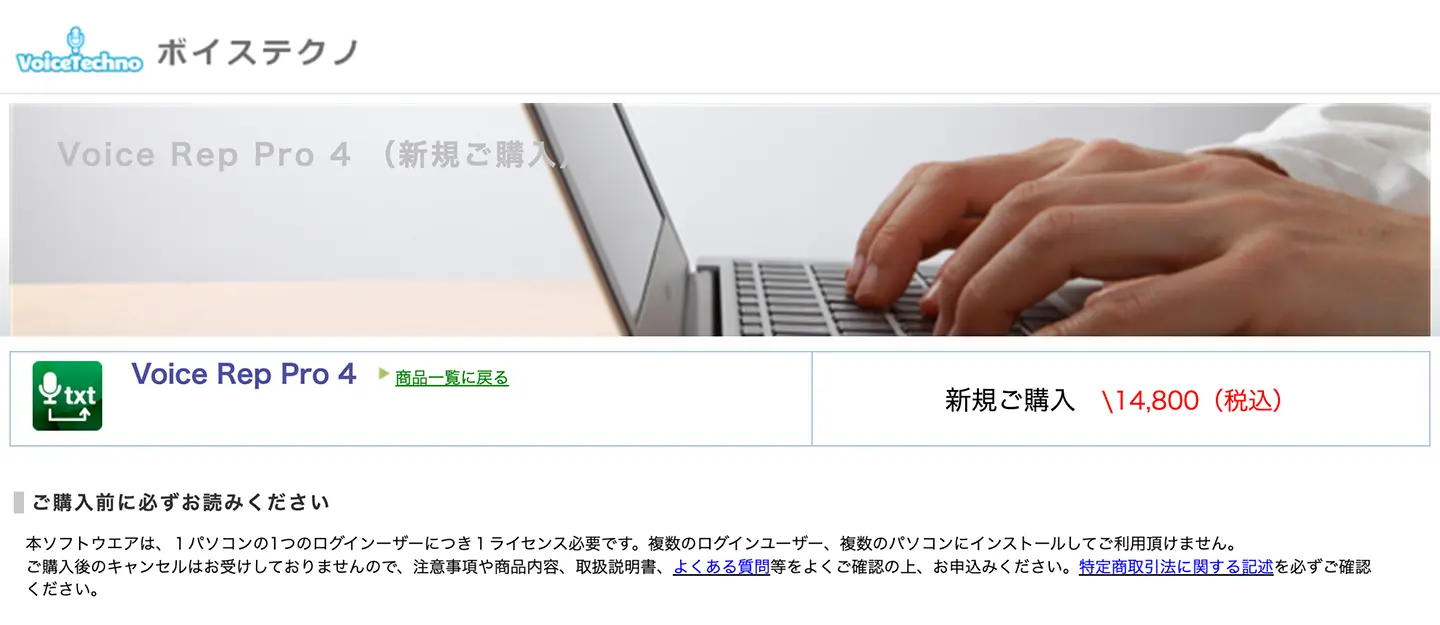
Voice Rep Pro 4 is an automatic transcription app that you install on a Windows PC.
It combines an automatic transcription service that performs speech recognition over the internet with a transcription editor and player software, so you can transcribe smoothly.
Speech recognition uses Google's engine.
The recognizable audio file formats are MP3, WAV and WMA.
The transcription editor also has a proofreading tool, and it is ideal for combining automatic transcription with keyboard transcription.
It is sold with a license that allows use on one computer per purchase.
7. Voice Code | A Windows App for Real-Time Transcription
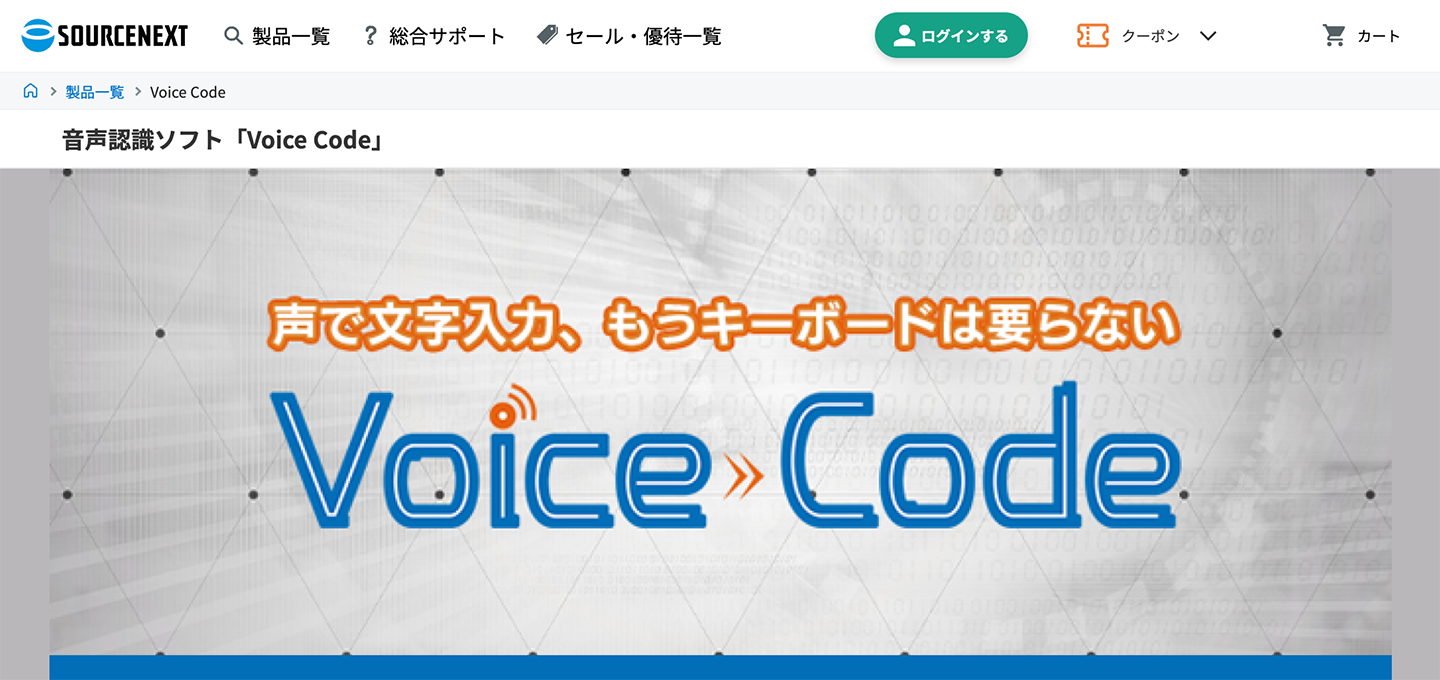
Voice Code is an automatic transcription tool provided by SOURCENEXT.
It is an app you install on a Windows PC, and it transcribes automatically based on voice input from the microphone.
It is basically a tool designed for speaking in real time into the microphone, so to transcribe recorded audio, you need a workaround such as repeating what you hear as the audio plays.
Like Voice Rep Pro 4, it uses Google's speech recognition engine for automatic transcription.
It is a tool specialized in Japanese transcription, and it also has a feature that automatically inserts punctuation throughout the text after transcription is complete.
8. Shunkan Text | An Image OCR App for Windows
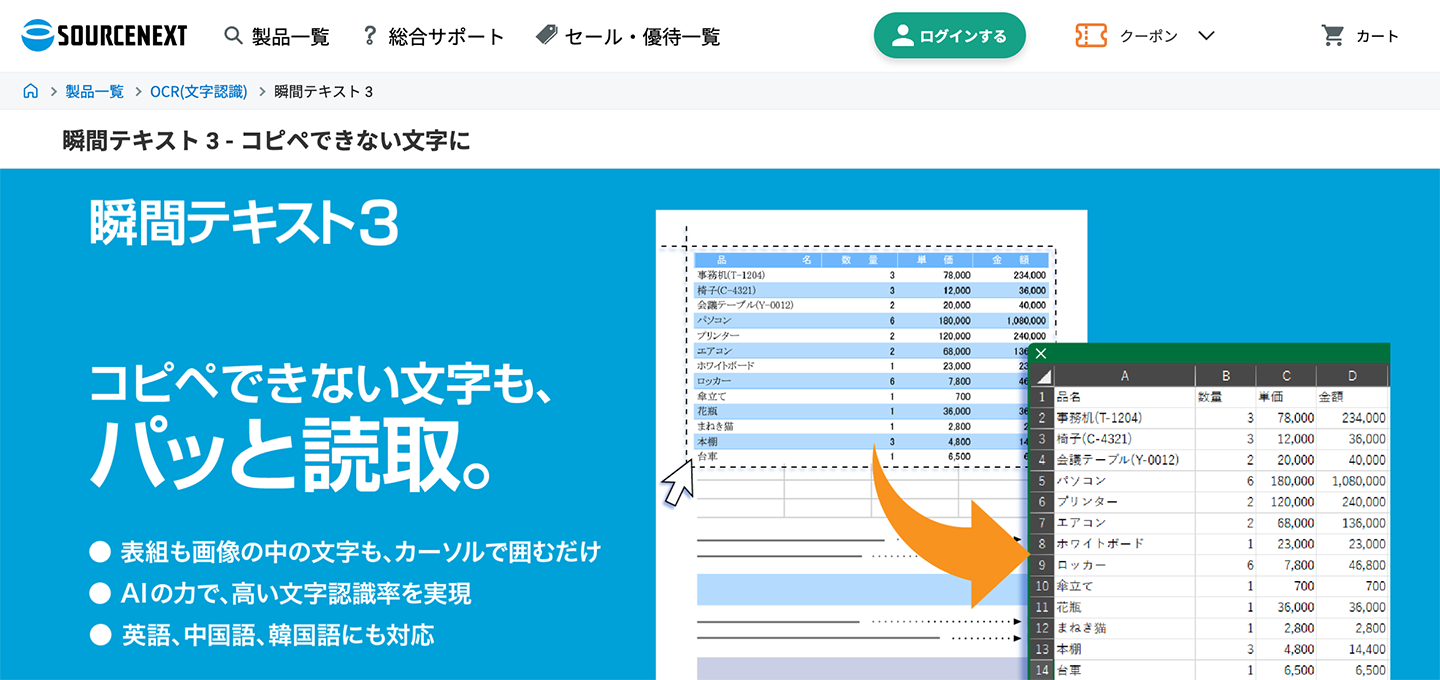
Shunkan Text is an app for automatically transcribing characters contained in images.
It recognizes characters written in an image (OCR) and converts them to text, so you can copy them as a text file.
You can select a range and transcribe only that part, so when you transcribe a flyer or poster, you can prevent separate sentences placed side by side from getting mixed up.
Its uses are limited, but if all you need is image transcription, it is a very convenient option.
9. Rec Text AI | A Windows Transcription App That Works Offline
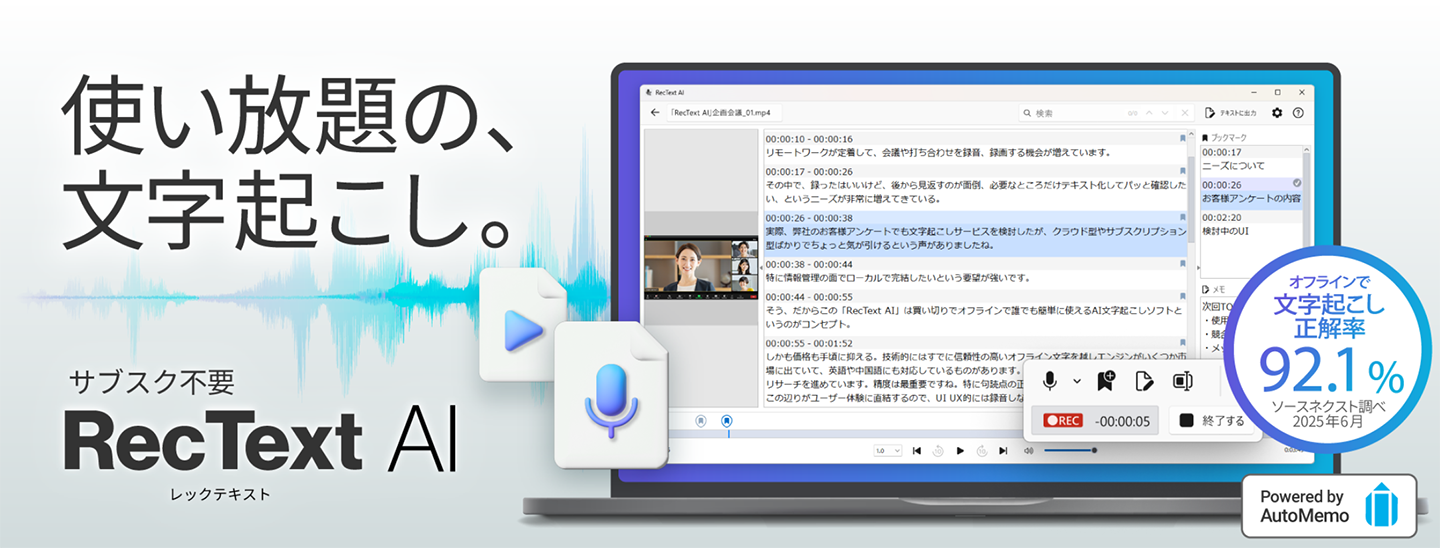
If you are looking for a transcription app that works offline on a Windows 11 PC, we recommend Rec Text AI.
Rec Text AI is a transcription app that you install on a Windows 11 PC.
Built for situations where company rules prevent the use of web apps or your internet connection is not fast and other cases that call for an offline app.
Its functions are limited, but it includes a speech recognition engine developed from an AI transcription app.
It supports Japanese and English.
It is paid software, sold as a one-time purchase.
10. Scribe Assist | An Offline Transcription App for Companies and Public Organizations
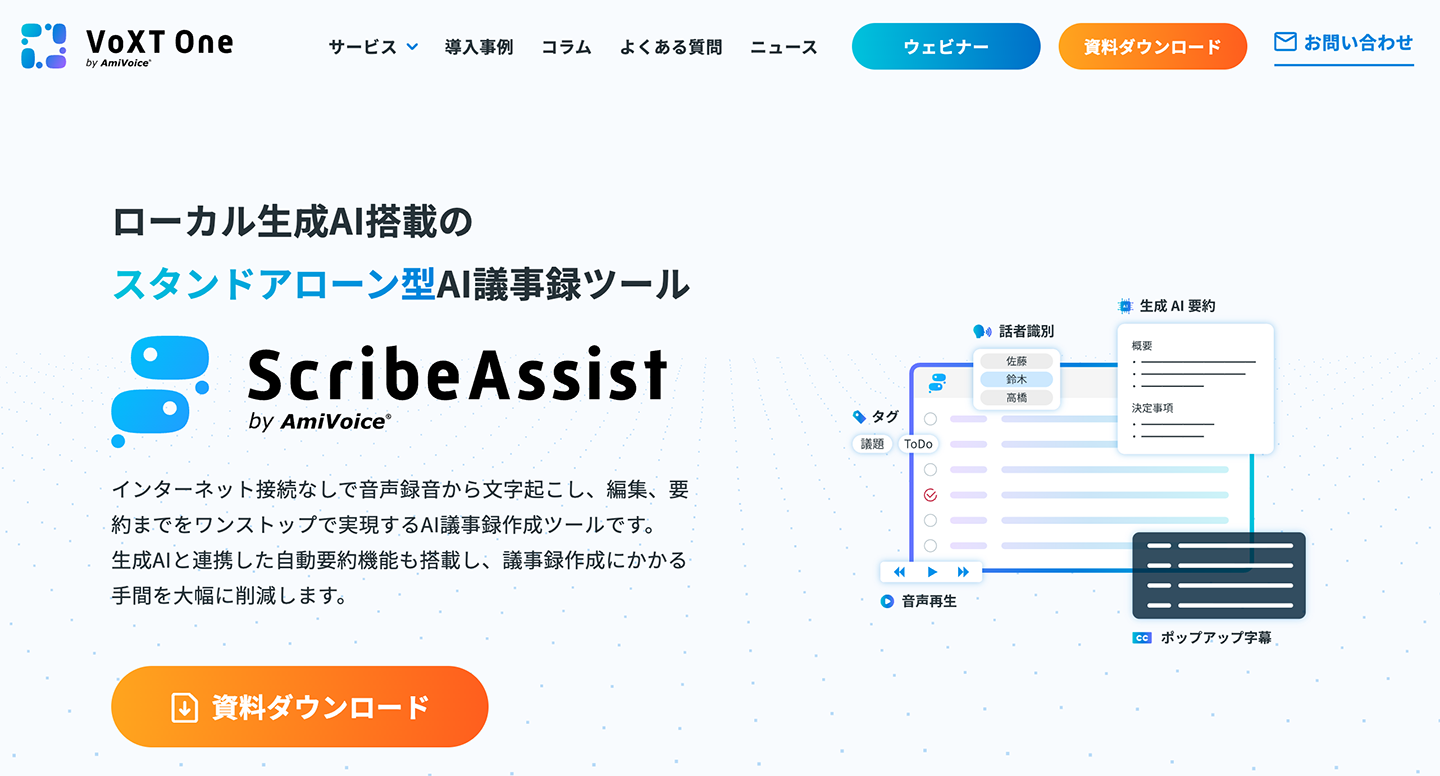
Scribe Assist is a transcription app that works offline on Windows 11.
It is an AI app that you can use locally and offline, even without the internet, and it can transcribe, edit and summarize in standalone mode.
It also has integration features with web conferencing apps, starting with ZOOM.
It was developed for use by companies and public organizations that cannot use online web apps.
Because it is a Windows app for businesses, you need to request a quote for the cost and pricing before using it.
Comparing the 3 Ways to Transcribe on Windows by Purpose

So far, we have explained the recommended apps for transcribing efficiently on a Windows PC.
When choosing a transcription method, the key point is what kind of audio you want to process, and where.
From here, we explain the features of the three transcription methods in more detail.
1. Real-Time Voice Typing with Built-In Windows Features
If you want to convert the voice you are speaking right now into text on the spot, the voice typing feature built into Windows 11 and Windows 10 is handy.
To start voice typing, just press “Windows key + H”.
After that, just speak into the microphone, and what you say is entered as-is in screens such as Notepad or Word.
*An internet connection is required.
You edit and save the entered text in the app that is open, such as Notepad or Word.
For detailed instructions, see “How to Transcribe in Real Time with the Built-In Windows Voice Typing Feature” later in this article.
2. Transcribe Recorded Audio and Video Files
If you want to convert files you have already recorded into text, we recommend using a service that can load the file and transcribe it.
The recording transcription feature of Microsoft 365 (Word) lets you transcribe while recording in Word, or upload a recorded file (WAV, MP4, M4A, MP3) and transcribe it.
*This is not a built-in Windows feature but a feature of Word (Microsoft 365).
To use it, you need to sign in with an account that has a Microsoft 365 subscription.
The transcription feature of Microsoft 365 is processed online, and the recording data is saved to OneDrive.
The transcription results are displayed separated by speaker.
You can correct the displayed transcription and then insert it into a Word document.
Google Docs also has a voice typing feature that converts what you say into the microphone into text.
However, you cannot upload a recorded audio file directly to Google Docs.
To transcribe a file, you need a workaround: play the audio file on your computer and have Google Docs recognize that sound.
The detailed steps are explained in the Google Docs section above.
A Transcription Service You Use from Your Browser Is Also Recommended
An even easier recommended method is uploading a file from your browser and transcribing it.
The AI transcription service “Mr. Transcription” supports a wide range of audio and video file formats, such as MP3, WAV and MP4.
Just upload your file, and the latest AI converts it to text automatically.
No software installation is needed, and as long as you have an internet connection, you can use it from multiple computers or when you are out.
With Mr. Transcription, after transcribing you can go on to use the AI summary, analysis and meeting minutes features.
The details and usage of the features are explained in this article, so please read it as well.
[Free] AI Summary and Meeting Minutes Features Now Available in Mr. Transcription! A Detailed Guide
The AI summary feature and the meeting minutes feature have been added to Mr. Transcription! With this feature, you can easily summarize long texts transcribed from audio. Meeting minutes can also be created easily just by pressing a button! Your daily work, study and information organization become smoother...
3. Process Audio Only on Your Computer with a Local App
If you want to transcribe only on your computer, without sending audio data over the internet, you can also install a transcription app that runs locally.
This method is useful when company rules prevent you from using online web apps or when your internet connection is not fast.
Among the apps introduced in this article, Rec Text AI and Scribe Assist are this type of app.
With Rec Text AI, you can load recorded audio and video files (MP4, WMV, WAV, MP3, M4A) and do everything from transcription to correcting results and saving text on your computer.
However, an internet connection is required for initial authentication, product registration and updates.
Scribe Assist is a standalone app that can transcribe and edit.
*An internet connection is required when using some of the summary features.
Speech recognition performance of locally processed apps is limited compared with online web apps.
Also, because the AI engine runs on your computer, transcription speed depends on your computer's specifications.
To use them comfortably, a high-spec computer is required.
Also, some transcription apps are distributed through the Microsoft Store.
The Microsoft Store is only a place to obtain apps, so an app being listed there does not mean it is a Microsoft app or a built-in Windows feature.
Check for each app who publishes it and where it processes audio.
Some Installed Apps Still Perform Speech Recognition Online
Some apps that you install on Windows perform the speech recognition itself over the internet.
Voice Rep Pro 4 is an app you install on your computer, but it uses Google's engine online for speech recognition.
Therefore, it cannot be used in places without an internet connection.
Voice Code is also an installed app, and what it can transcribe is your voice spoken in real time into the microphone.
It cannot load and transcribe a recorded audio file directly.
Not every app installed on a computer works offline, so if you want to use one offline, we recommend checking how the app performs speech recognition.
Dedicated Player Apps (Audio Playback Software) That Help with Manual Transcription
If you transcribe by typing on the keyboard yourself, rather than the standard media player, we recommend working while listening to audio with a dedicated audio playback app.
Among the apps introduced in this article, Okoshiyasu2 and Express Scribe are dedicated transcription player apps (playback software).
The “Tape Transcription Player” (Tape Okoshi Player) once provided by ASKA21 Co., Ltd. was also a standard, popular playback software, but unfortunately it can no longer be downloaded.
Loop Sessions LLC, which was in charge of developing the “Tape Transcription Player,” acquired the rights, and it has been re-released on this page.
Using a dedicated transcription player lets you control audio easily with shortcut keys, and useful features such as noise reduction are also available, which makes the work much more efficient.
Even now that transcription can be done with AI, audio playback software for transcription is useful for the final check and finishing of files transcribed by AI.
Also, Shunkan Text is an app for reading (OCR) text written in images.
Its use differs from transcribing audio and video, so use it when you want to convert paper documents or screenshots into text.
How Do You Automatically Transcribe Meeting Minutes with Windows 11 and Recommended AI Apps?

One of the main situations where transcription is used is meeting minutes.
Many company PCs run Windows, so by using the transcription apps introduced in this article, you can make transcription work far more efficient and faster.
So how exactly do you transcribe?
Here we explain the flow of automatically transcribing meeting minutes using the web app “Mr. Transcription.”
1. Record the Meeting
First, prepare an IC recorder or a smartphone and record the meeting.
The key is to adjust the direction of the microphone so that the voices of all participants are captured.
We also recommend attaching an external omnidirectional microphone (a microphone that records sound from all directions).
This article explains how to record in detail, so please take a look.

[AI Transcription] 6 Recording Tips for Highly Accurate Transcription
To get highly accurate AI transcription, a few techniques are important when recording. This article introduces the best recording tips for AI transcription. A high-quality microphone, microphone in the right position, a quiet recording environment, clear speech, one person...
2. Transfer the Meeting Audio Data to Your Windows 11 PC
Copy the audio data of the meeting recorded with an IC recorder or smartphone to your Windows 11 PC.
3. Open the AI Transcription Web App “Mr. Transcription”
To transcribe the meeting minutes, open the top page of “Mr. Transcription”.
4. Upload the Audio File
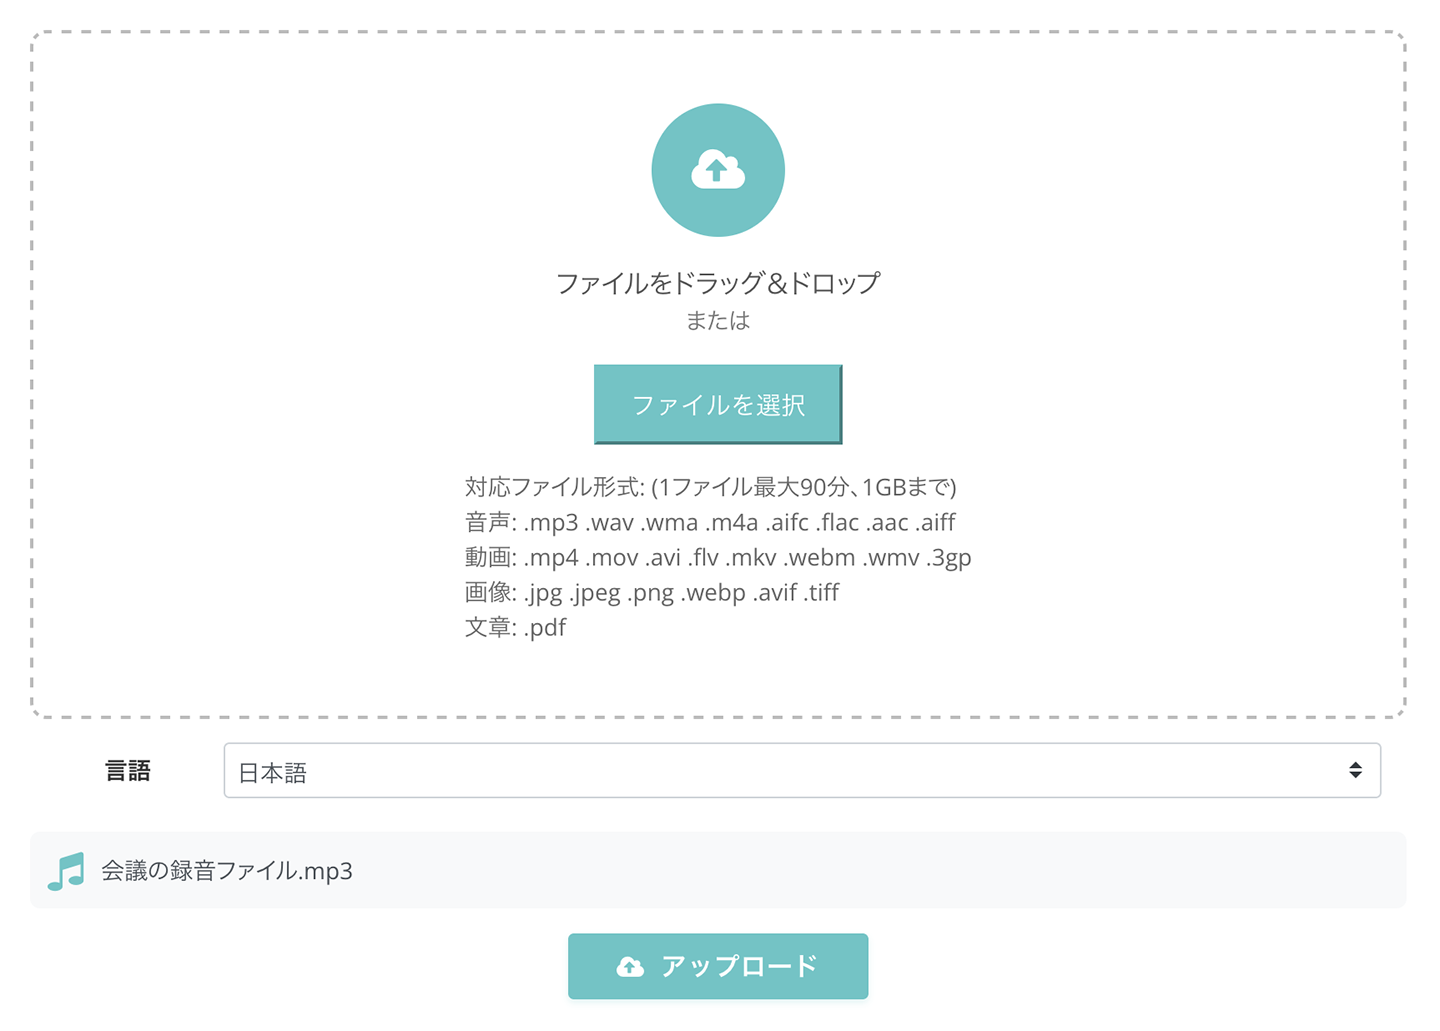
On the top page of “Mr. Transcription,” click “Select file” or drag and drop the file to upload the audio file of the meeting minutes.
Mr. Transcription supports MP3, WAV, WMA, M4A, AIFC, FLAC, AAC, AIFF and AIFC, so it supports all the main audio file formats, and you can simply upload your file as it is.
5. Automatic Transcription of the Meeting Minutes Starts
Once the audio file is uploaded, transcription of the meeting minutes starts automatically.

If you are registered and logged in, you are notified by email when transcription finishes, so you can close the page after processing starts.
(*If you are using it without registering or logging in, keep the page open and wait for processing to finish.)
6. Automatic Transcription of the Meeting Audio Is Complete
When transcription is complete, the content is displayed automatically.
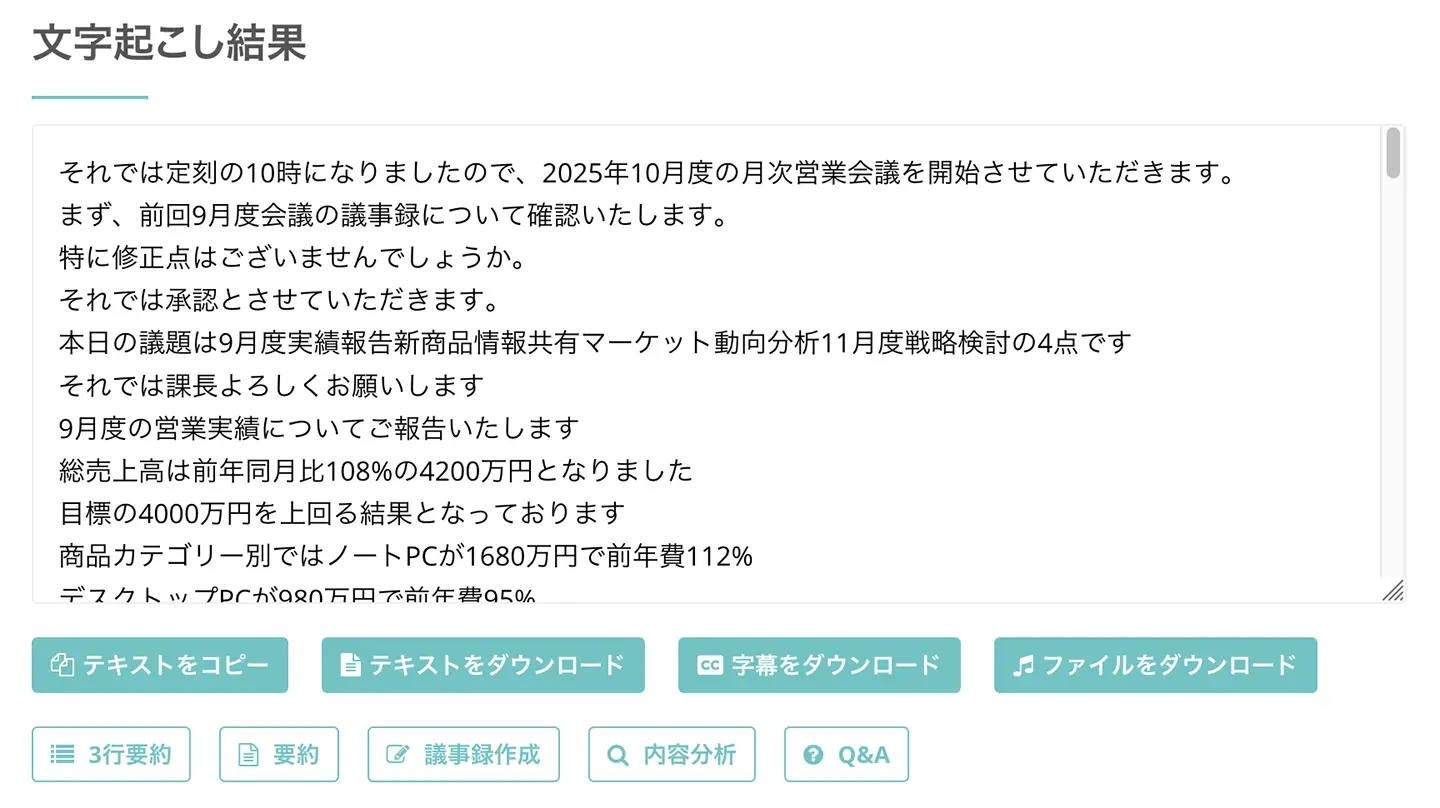
You have now automatically transcribed the meeting audio in the browser on Windows 11.
7. Create Meeting Minutes Automatically with the AI Features of Mr. Transcription
From the text of transcription results of audio or video, Mr. Transcription can automatically summarize, analyze and create meeting minutes.
Creating minutes is very easy.
Processing starts just by pressing the “Create Minutes” button shown below the transcription result.

Just like this, the latest AI creates the minutes right away!
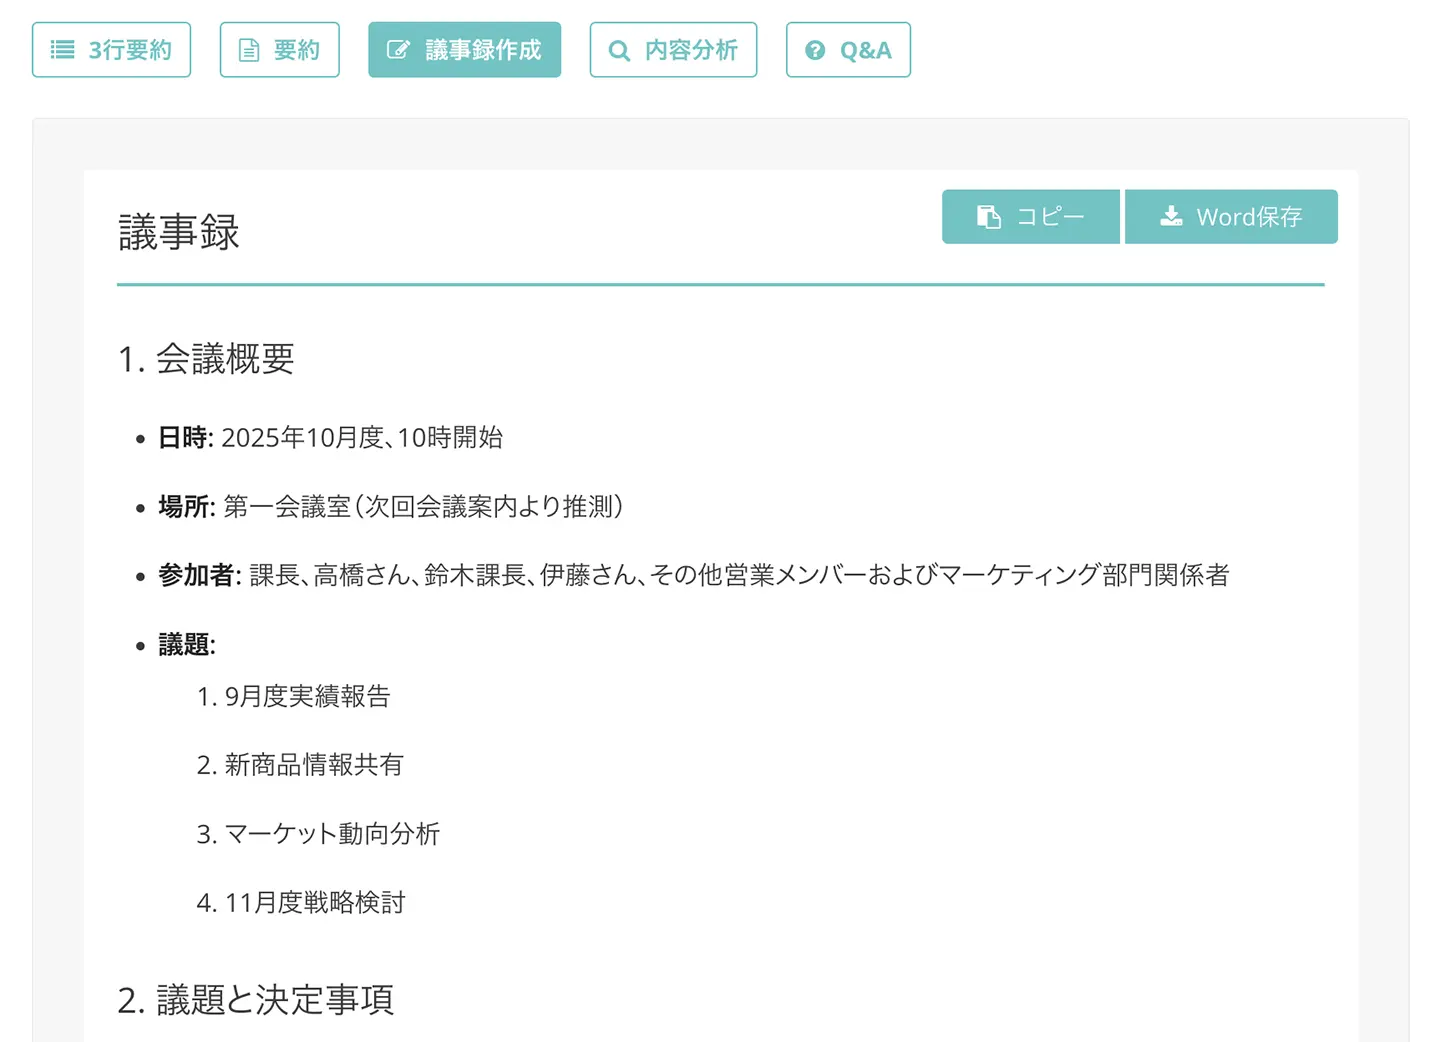
In this way, with “Mr. Transcription,” you can automatically create minutes from an audio file!
Free to use, so why not experience creating minutes with “Mr. Transcription” yourself first?
How to Transcribe in Real Time with the Built-In Windows Voice Typing Feature
The company didn't allow AI transcription services or dedicated software……

In that case, try the built-in Windows voice typing feature.
Windows 11 and Windows 10 come with a built-in voice typing feature that converts your voice spoken into the microphone into text in real time.
To use the built-in voice typing feature, you need a built-in or external microphone.
An internet connection is also required, and offline environments are not supported.
However, this feature can only transcribe your voice as you speak into the microphone right now, and it cannot load and transcribe a recorded audio file.
Another drawback is that the accuracy is not very high.
If you want to convert a recorded file into text, we recommend the method “Transcribe Recorded Audio and Video Files” introduced earlier.
Here we briefly explain how to transcribe with the built-in Windows voice typing feature.
*Here we use Windows 11 as an example.
How to Transcribe with Voice Typing in Windows 11
To transcribe with the voice typing feature built into Windows 11, first open an app such as Notepad or Word and get it ready for text input.
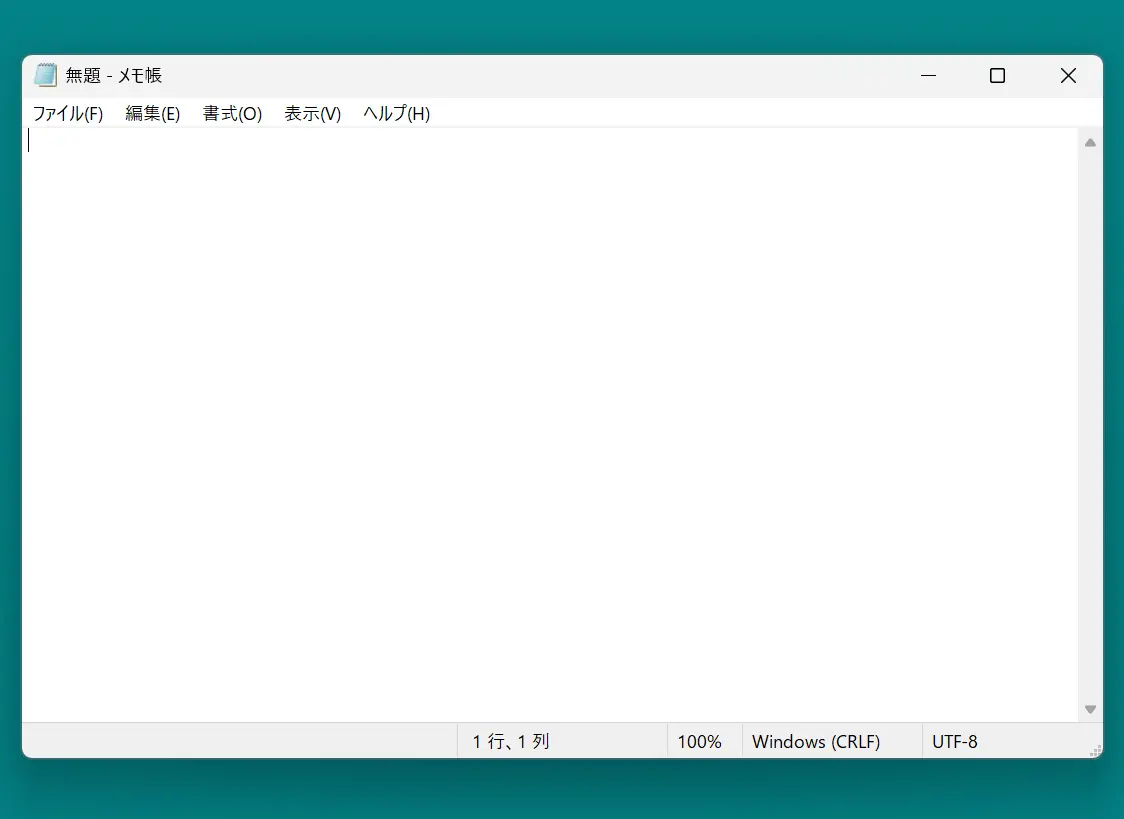
Next, press “Windows key + H” to launch the speech recognition toolbar.
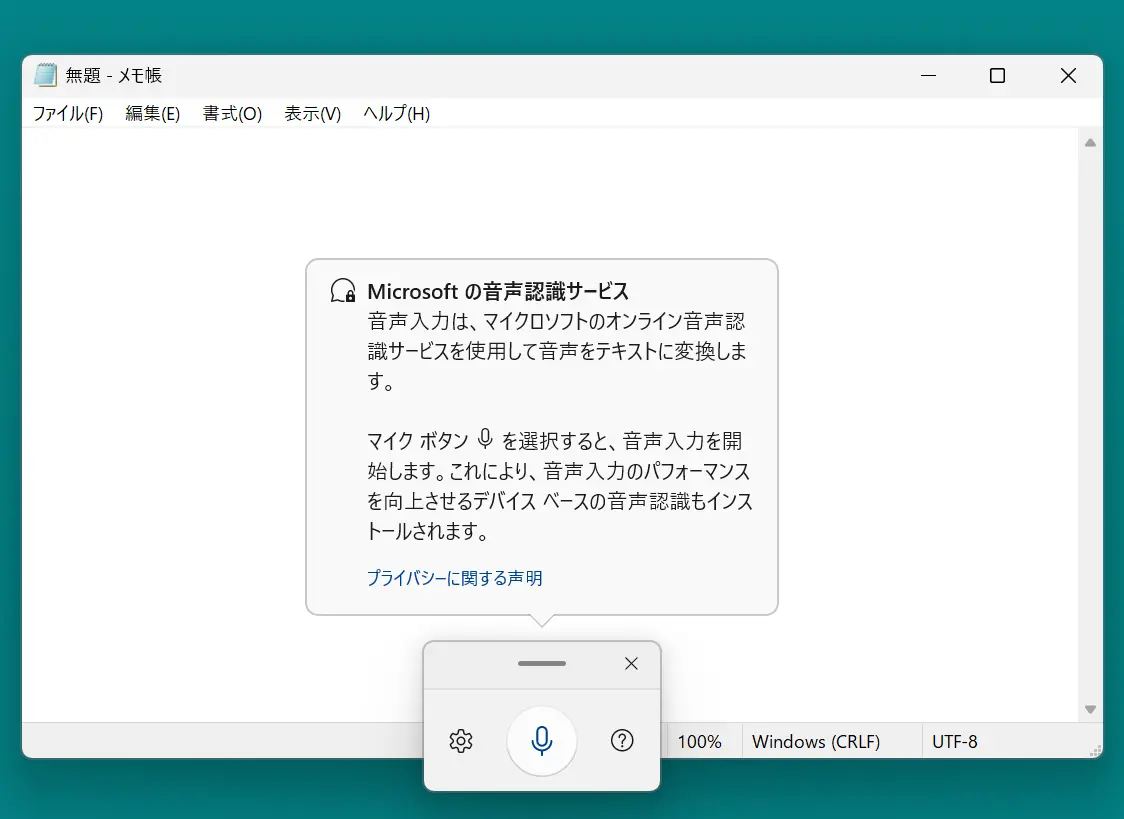
Before you start voice typing, press the settings icon (the gear mark) to do the initial setup.
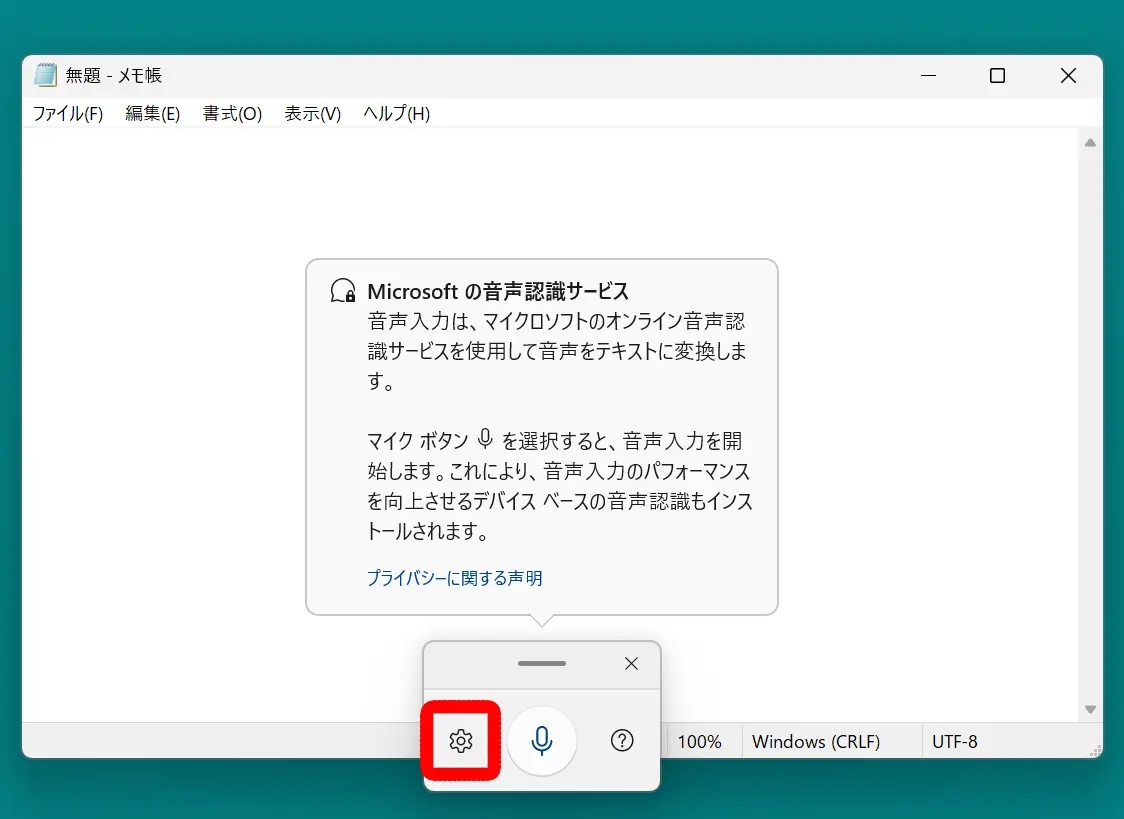
When the settings screen opens, find the following two items
- Voice typing launcher
- Auto punctuation
and turn them on.
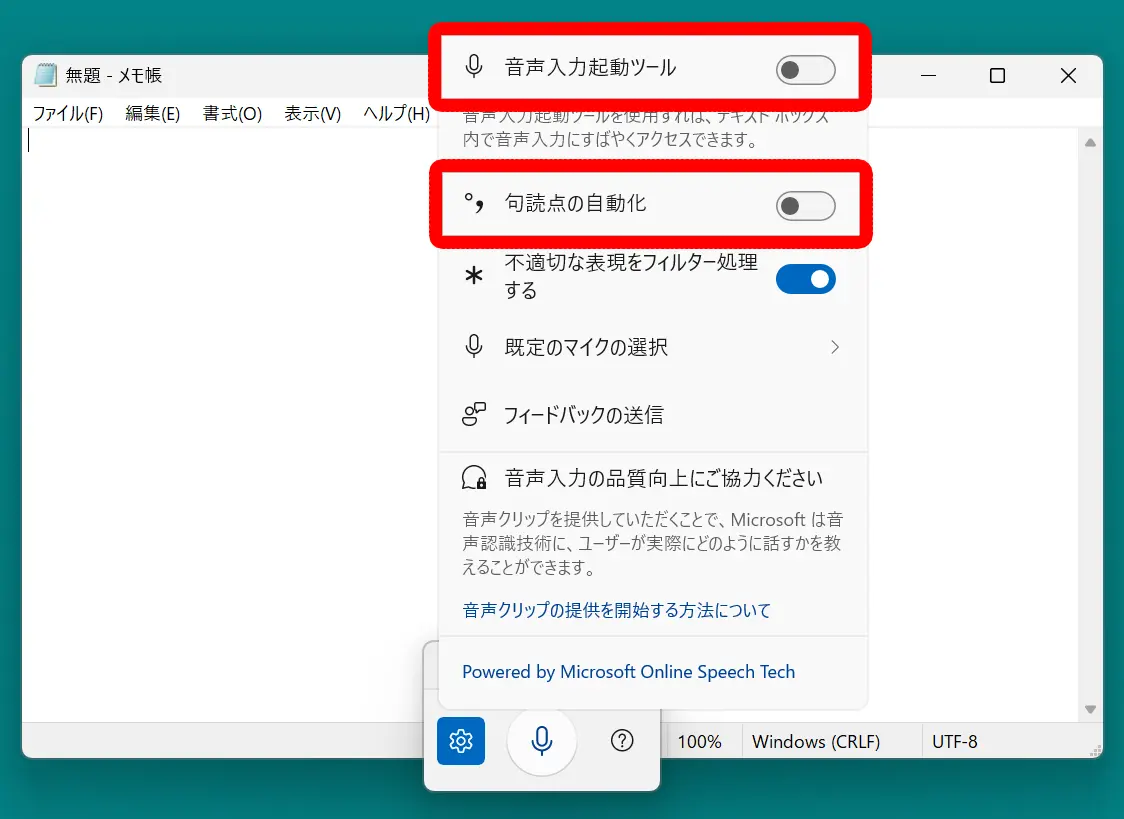
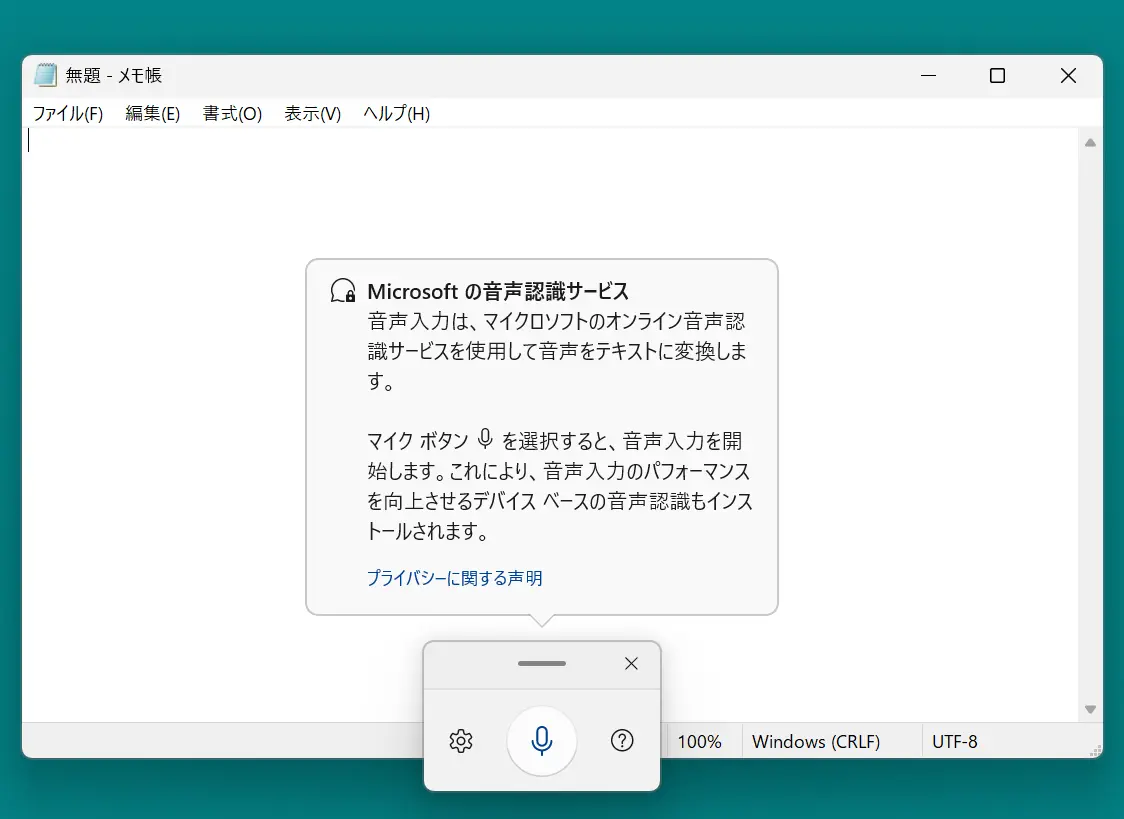
Voice typing is now ready.
Click the microphone icon and voice typing starts.
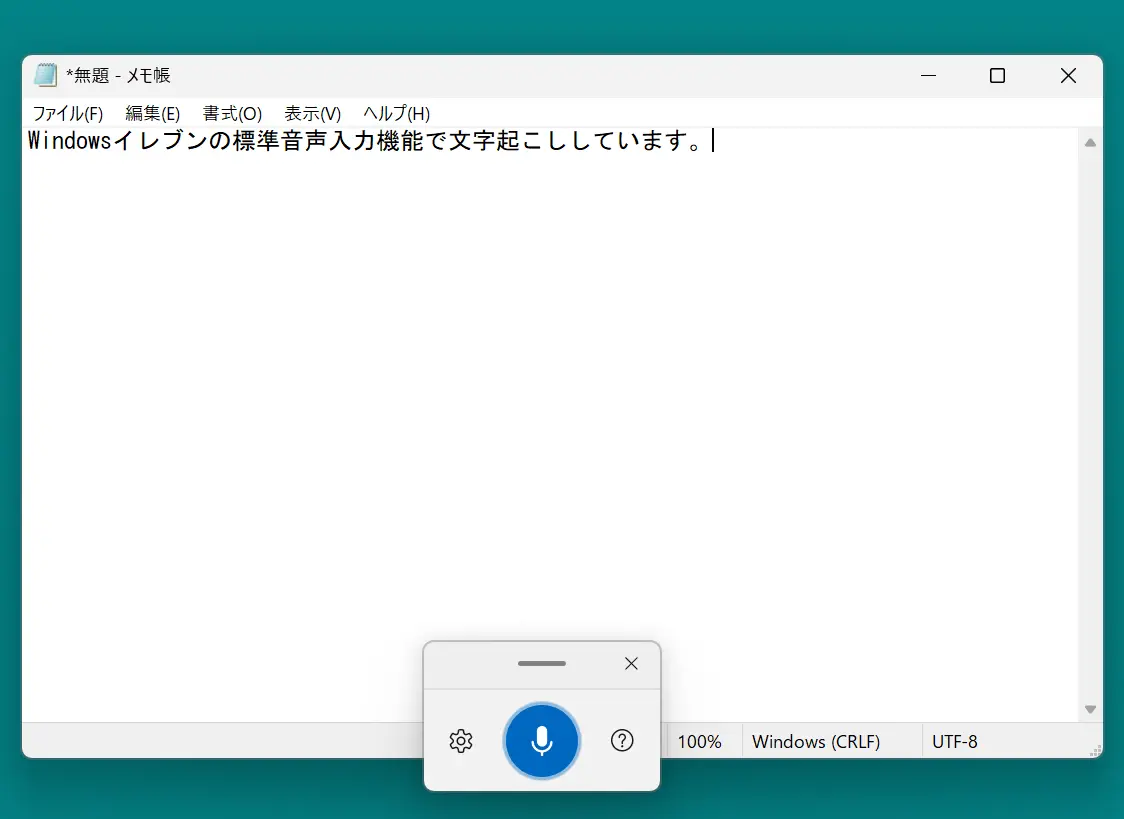
When you speak into the microphone, you can transcribe with the built-in voice typing feature of Windows 11, as shown here.
When you finish typing, save the file in an app such as Notepad or Word and you are done.
What the Built-In Windows Voice Typing Feature Can and Cannot Do
What the built-in Windows voice typing feature can do is convert what you say into the microphone into text on the spot.
You edit and save the entered text in the destination app, such as Notepad or Word.
One thing to note is that its processing performance has limits.
It may not transcribe well in situations such as meetings where many people speak at the same time.
Also, compared with AI transcription services, which have been advancing rapidly in recent years, the built-in automatic transcription feature of Windows is inevitably inferior in performance.
If the built-in transcription feature does not satisfy you, we recommend using an AI transcription service such as “Mr. Transcription”!
3 Tips to Improve Automatic Transcription Accuracy with Windows 11 and Popular AI Apps

Always Save the Audio File (Recording Data)
We recommend always saving audio files such as MP3, WAV and WMA, and making a backup as well.
With tools that support real-time voice input, you can transcribe a conversation on the spot without keeping the recording, but even when you use such tools, it is wise to save the audio file separately.
When you edit the transcribed text later, it also goes more smoothly if you can listen to the original audio.
Depending on the case, you may be left at a loss with no recording and an automatic transcription that did not turn out properly….
Recording audio is easy even on a smartphone these days, so to be extra safe, we recommend keeping a backup carefully.
Recording with Clear Sound Quality Is Also Recommended
The quality of automatic transcription depends greatly not only on the speech recognition accuracy of the tool itself but also on the quality of the audio that is input.
- Choose a place where ambient noise is less likely to get in
- Speak as close to the microphone as possible
- Speak slowly and clearly
Recording with the best possible sound quality like this is recommended.
When recording with a smartphone or PC, preparing an external microphone with high directionality separately instead of the built-in microphone improves the sound quality even more.
If you have the time, we also recommend adjusting the volume and removing noise from the recorded audio file with a dedicated app (such as Audacity).
Audacity, a Popular Standard Free Audio Editing Software
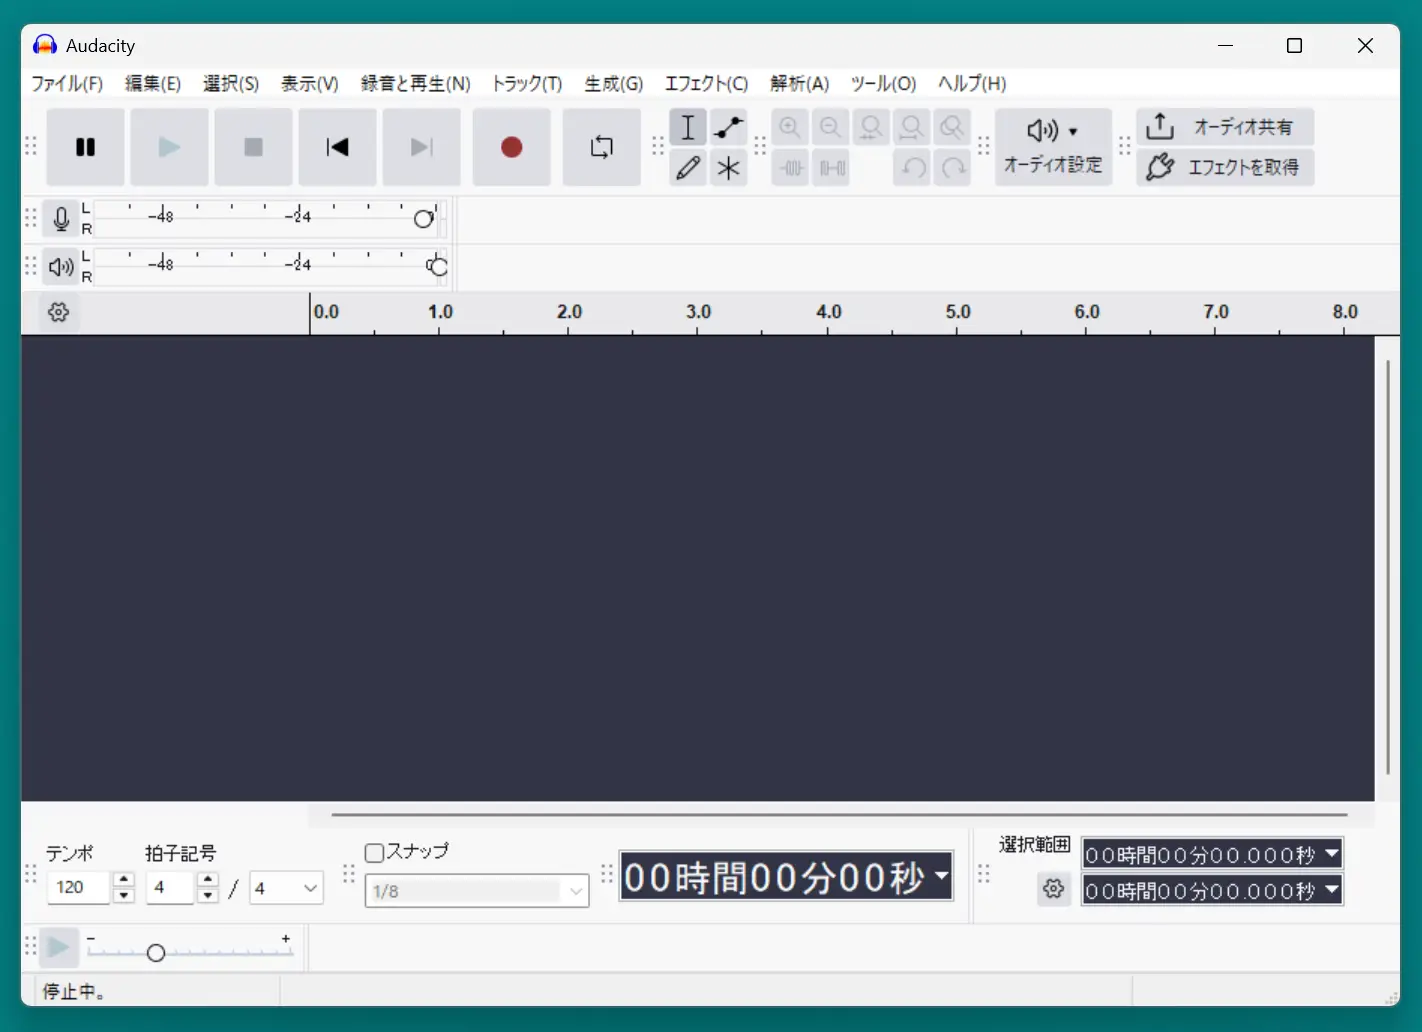
To edit recorded audio, we recommend the free software Audacity.
Audacity is a standard, popular free audio editing software, and it is available free of charge for Windows, Mac and Linux.
It is long-established software with plenty of usage information on the internet, so if you edit audio with free software, we recommend using Audacity.
It is easy to use: drag and drop an audio file such as MP3, WAV or WMA to load it, and then just adjust the volume and remove noise.
Operations such as selecting with the mouse and cutting or deleting unwanted parts are also easy to understand at a glance.
The Japanese version of Audacity can be downloaded from Mado no Mori, a site that publishes software for Windows.
If you want to edit audio files such as MP3, WAV and WMA, try downloading Audacity first.
“Audacity” Free Audio Editing Software - Mado no Mori
What to Do When Audacity for Windows Freezes
However, Audacity for Windows has a bug: it may freeze when you type characters on the keyboard while using it.
This is caused by a bug that makes it incompatible with the IME (Japanese input software) of the Japanese version of Windows.
There are two ways to work around the Audacity bug.
1. Use a Previous Version of Microsoft IME
From Windows “Settings,” open “Time & language” → “Japanese,” and in the options there, select “Use previous version of Microsoft IME.”
This stops the version of the IME that is incompatible with Audacity from being used, so you can avoid the freeze.
2. Use an Older Version of Audacity
You may also be able to avoid the freeze by using an older version of Audacity, version 2.4.2 or earlier.
However, be careful, because older versions may have security problems.
You can download older versions of Audacity from the Audacity official website, via this site, which is linked from there.
Try Multiple Transcription Tools
Each automatic transcription tool has its strengths and weaknesses, and there is more or less a question of compatibility with your data.
So if transcription does not go well, one option is to try a different tool.
As introduced here, there are many transcription apps and services you can use for free, so install (or bookmark) as many as possible in advance to be prepared when you need them.
Summary of Automatic Transcription Apps and Recommended Methods for Windows 11
This article explained how to transcribe on a Windows 11 PC.
Over the years, countless apps and software, both free and paid, have been released for Windows.
Many people probably end up using a familiar note app or Word because looking for tools and learning how to use them is a hassle, don't they?
In fact, advances in AI technology have made it possible to convert audio and video into text in far less time and with far higher accuracy than before!
Why not try the recommended Windows apps introduced here and experience how convenient they are?
■ AI transcription service "Mr. Transscription"
"Mr. Transcription" is an online transcription tool that can be used from zero initial cost and 1,000 yen per month (* free version available).
- Supports more than 20 file formats such as audio, video, and images
- Can be used from both PC and smartphone
- Supports technical terms such as medical care, IT, and long-term care
- Supports creation of subtitle files and speaker separation
- Supports transcription in approximately 100 languages including English, Chinese, Japanese, Korean, German, French, Italian, etc.
To use it, just upload the audio file from the site. Transcription text is available in seconds to tens of minutes.
You can use it for free if you transcribe it for up to 10 minutes, so please try it once.

It is "Mr. Transcription" who can easily transcribe from audio, video, and images.
Transcription allows you to transcribe for up to 10 minutes for free.
You can copy, download, search, delete, etc. the transcribed text.
You can also create subtitle files, which is ideal for transcription of interview videos.
HP: mojiokoshi3.com
Email: mojiokoshi3.com@gmail.com
Email: mojiokoshi3.com@gmail.com
Related article
Transcription for audio / video / image transcription. It is a transcription service that anyone can use for free without installation.
- What is Mr. Transcription?
- Transcript images, sounds, and videos with Mr. Transcription
- Free registration
- Rate plan
- manual
- Try other free services